If you have been running a custom loop for any length of time, you will know that water blocks are arguably the most maintenance-sensitive component in the entire system. Their micro-channel fin arrays, often just 0.2mm thick, provide excellent surface area for heat transfer. Those same tight channels, however, are quite vulnerable to build-up from coolant residue, radiator flux, biological growth, and corrosion deposits. A neglected block can raise CPU temperatures by 5-10°C or more, which is obviously not ideal. So how do you go about cleaning one properly, and what should you avoid? Let’s walk through it.
Periodic cleaning keeps temperatures low, flow rates healthy, and your pump unstressed. I would say this is one of those jobs that sounds fiddly but is actually a doddle once you know the process.
When to Clean Your CPU Block
Most manufacturers recommend a full loop service every 6-12 months. At a minimum, you should flush the block with distilled water at every coolant change and perform a full disassembly clean once a year.
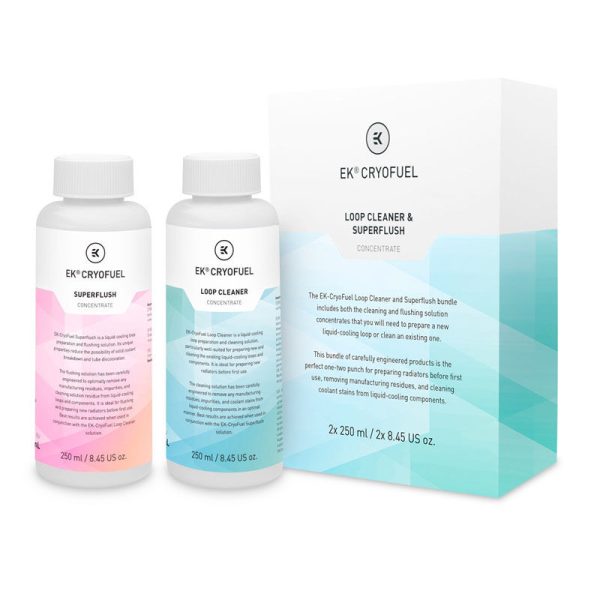
- SKU: WAEK-2491
- MPN: 3831109897720
- EAN: 3831109897720
- SKU: WAEK-2490
- MPN: 3831109897713
- EAN: 3831109897713
- Available for Collection
- SKU: LC-ULTRA5000-CL
- MPN: 5060684862139
- EAN: 5060684862139
- Available for Collection
- SKU: LC-ULTRA1000-CL
- MPN: 700461855262
- EAN: 0700461855262
- Available for Collection
Warning signs that cleaning is overdue include rising CPU temperatures (3-5°C above your baseline), visible discolouration through an acrylic top, reduced flow rate, or particles floating in the reservoir. You should also perform a full clean when switching coolant brands, changing from coloured to clear coolant, or after discovering mixed metals in the loop.
With quality clear coolant and properly flushed radiators, some builders go 18-24 months between services. With coloured or opaque coolants, plan for 6-9 months as pigment particles settle regardless of brand quality. That is just the nature of the beast.
Types of CPU Water Blocks
Top Materials
Acetal (POM/Delrin) tops are opaque black, chemically resistant, and tolerate isopropyl alcohol and most solvents. The trade-off is that you cannot visually inspect the internal channels without disassembly.
Acrylic (Plexi/PMMA) tops are transparent, letting you see build-up forming. However, they are extremely sensitive to chemicals. Even small amounts of alcohol or acetone cause crazing, which refers to irreversible micro-fractures that weaken the material and can lead to leaks under pressure. It is worth being quite careful here.
Cold Plate Materials
Nickel-plated copper is the most common cold plate material. The thin electroplated layer requires gentle treatment. No acids, no vinegar, no abrasives. Bare copper is more forgiving and tolerates weak acids and mild abrasives for tarnish removal.
Copper naturally forms a brownish-black oxide layer when exposed to water. This oxidation does not affect thermal performance and actually helps protect the underlying copper. I would say do not chase a perpetually shiny surface. It is not necessary and you risk doing more harm than good.
Internal Components
Inside the block sits a jet plate between the inlet and the micro-fin array, directing coolant flow over the CPU die area. Both the jet plate orientation and its relationship to the micro-fins are critical. Reassembling incorrectly causes significant performance loss, so this is something to pay close attention to.
Disassembly Procedure
Removing the Block from the CPU
Run the PC for 10-15 minutes before removal. Warm thermal paste separates easily, while cold paste acts like glue. After powering down and draining the loop, loosen mounting screws in a cross pattern, then use a gentle twisting motion to break the thermal paste seal.
For AMD AM4 (PGA socket), twist carefully to avoid pulling the CPU from the socket. I do feel this is an easy mistake to make if you are not paying attention, and it can bend pins, so take your time.
Taking the Block Apart
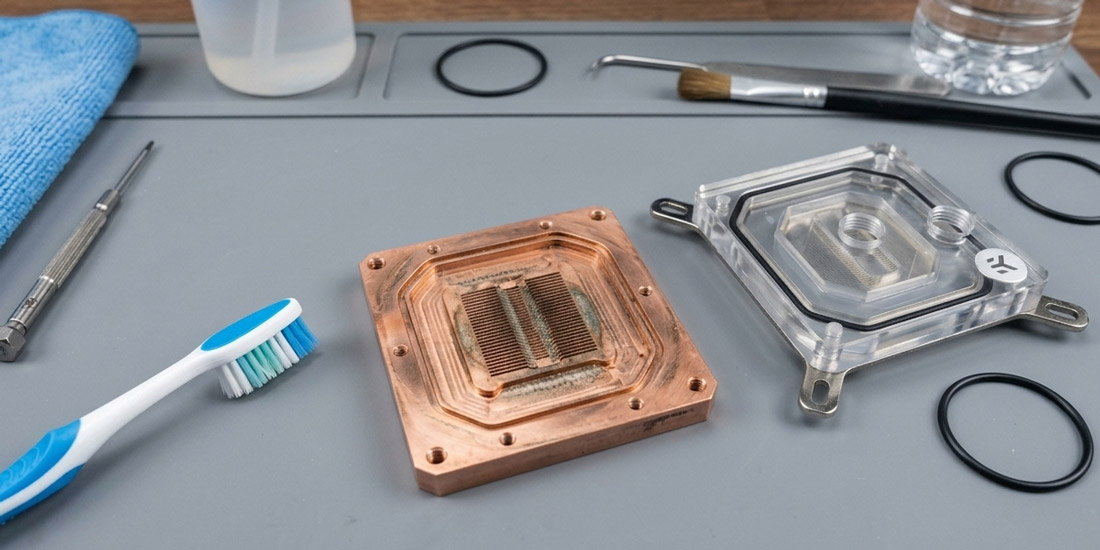
Photograph screw positions and jet plate orientation before disassembly. I would strongly recommend this. Most blocks use four screws from the bottom with a hex key (2.5mm for EK Velocity, 2mm for EK Magnitude). Remove the screws, separate the top from the cold plate, and lift out the jet plate.
You will have four components: the top piece, jet plate, cold plate with micro-fins, and o-rings. It is worth noting that disassembly for cleaning does not void the warranty with most manufacturers, though it does void any leak-free guarantee from factory testing.
Cleaning the Cold Plate and Micro-Channels
For routine cleaning, soak the cold plate in warm soapy water for 5-10 minutes, then scrub the micro-fins with a soft-bristled toothbrush, working along the direction of the fins. Rinse 2-3 times with tap water, then 2-3 times with distilled water to eliminate mineral residue. Air dry completely.
For bare copper with visible deposits, a white vinegar soak (10-30 minutes) removes tarnish and mineral scale quite effectively. Citric acid dissolved in distilled water works similarly. For heavy tarnish, follow with copper polish. Never use acids or vinegar on nickel-plated cold plates. Use warm water and a non-abrasive automotive metal polish only.
For severe clogs, an ultrasonic cleaner with a mild solution dislodges particles that brushing cannot reach. Plastic dental picks can carefully clear individual channels, though the fins bend easily and require a gentle hand. It is not a job you want to rush.
Cleaning the Top
Acetal Tops
High-purity isopropyl alcohol is the best cleaning option for acetal. It cuts through residue and evaporates cleanly. Warm soapy water with a soft cloth works for general cleaning. Despite its toughness, acetal scratches more easily than you might expect, so use soft cloths and avoid abrasive pads.
Acrylic Tops
Never use isopropyl alcohol, acetone, or ammonia-based cleaners on acrylic. The only safe method is warm water with mild dish soap, applied with a soft cloth or extra-soft toothbrush. Dry with a microfibre cloth using straight linear motions.
For stubborn stains, high-quality naphtha is safe for acrylic where IPA is not. Specialist acrylic polishes (such as the Novus three-step system) can restore scratched acrylic to near-new clarity. Never use paper towels on acrylic as they scratch the surface. On a subjective note, I think acrylic tops look quite swish when properly maintained, so it is well worth the extra care.
Inspecting and Replacing O-Rings
Inspect o-rings for cracking, hardening, permanent compression set, nicks, and swelling. Replace any that show these signs. Before reinstalling, apply a thin film of silicone grease (Dow Molykote 111 or similar) to help them stay seated in their grooves during reassembly. Do not use petroleum jelly as it can degrade certain rubber compounds.
If replacements are needed, measure the internal diameter and cross-section thickness and source nitrile (NBR) o-rings in matching dimensions. Most manufacturers sell replacement kits, which makes this relatively painless.
Reassembly
The jet plate slits must run perpendicular to the micro-channel fins. Fitting it rotated 90 degrees is the most common reassembly mistake and causes significantly worse thermal performance. This is why I recommended photographing the orientation before disassembly.
Seat all o-rings in their grooves, then tighten screws in a cross pattern. Finger-tight first, followed by a final even pass. Do not overtighten. After reassembly, leak test the block in the loop for several hours with paper towels underneath before mounting on the CPU.
For mounting, clean the CPU IHS and cold plate contact surface with 99% IPA and a lint-free cloth. Apply thermal compound (approximately two rice-grain-sized dots) to the CPU IHS and let mounting pressure distribute it. Tighten mounting hardware in a cross pattern for even pressure.
What to Use and What to Avoid
Safe for all materials: distilled water and mild dish soap. Safe for bare copper: white vinegar, citric acid, Brasso. Safe for acetal: isopropyl alcohol. Safe for nickel: non-abrasive metal polish.
Never use on acrylic: IPA, acetone, ammonia cleaners. Never use on nickel: vinegar, acids, abrasive pads, strong descalers. Never use as a final rinse: tap water (it leaves mineral deposits). It is quite easy to remember once you have done it a few times, but I would recommend bookmarking this list if you are new to custom loop maintenance.
Expected Results
A routine clean yields a 1-3°C improvement. Moderately contaminated blocks see 3-5°C improvement. Severely clogged blocks can improve by 5-10°C or more. If temperatures remain high after cleaning, check elsewhere in the loop. Degraded thermal paste, clogged radiators, failing pumps, or inadequate fan speeds are all potential culprits.
To prevent future contamination, flush new radiators thoroughly before first use, use quality coolant with biocide and corrosion inhibitor, never mix aluminium with copper or nickel components, and plan for more frequent maintenance with coloured coolants. For those running a custom loop, this is one of those jobs that is not exactly glamorous but is well worth doing regularly. The thermal improvements speak for themselves, and the process, once you have done it a couple of times, is dead easy. I would say the only real gotcha is the jet plate orientation and the acrylic cleaning restrictions. Keep those in mind and you should have no issues at all.